 |
This sketch (which was a design derived from a waterlily
leaf) was the one I chose to work on for this sampler.
I like the way there is an architectural feel to the arches,
like churches on a hill in Southern Europe,and between
them some texture that I could work in different techniques.
|
In my sketchbook I made a rough sketch using pencil to indicate lines of texture in wide stripes formed by manipulating the fabric, overlaid with paper cut outs to indicate relief untextured arches.
I was thinking about layering fabrics on the arches to give them colour and different kind of texture, but realised that the exercise did not allow contrasts of colour, and seems to be intended to make me use only one piece of fabric. The instructions recommend calico, but I find the undyed slightly speckled cream of it makes me go all folksy and I wanted this sample to be sharper than that. Also I wasn't sure how well it would take the PVA moulding I wanted to do for the arches, so I chose bleached cotton of a comparable weight.
 |
| Rough sketch of what I wanted to do. |
I was thinking about layering fabrics on the arches to give them colour and different kind of texture, but realised that the exercise did not allow contrasts of colour, and seems to be intended to make me use only one piece of fabric. The instructions recommend calico, but I find the undyed slightly speckled cream of it makes me go all folksy and I wanted this sample to be sharper than that. Also I wasn't sure how well it would take the PVA moulding I wanted to do for the arches, so I chose bleached cotton of a comparable weight.
 |
| I made a mould out of air-dry clay. This worked from the point of view of making a hard shape exactly as required. But it left some residue on the back of the cloth, and as you can see from this photo it is breakable. |
 |
The arches were made by painting
the fabric with pva and folding over
the mould until it dried.
|
I tried to make them in a pattern like a section of the first blue and red sketch. One came out at an angle.
Then I started making the horizontal lines of texture I had planned.
 |
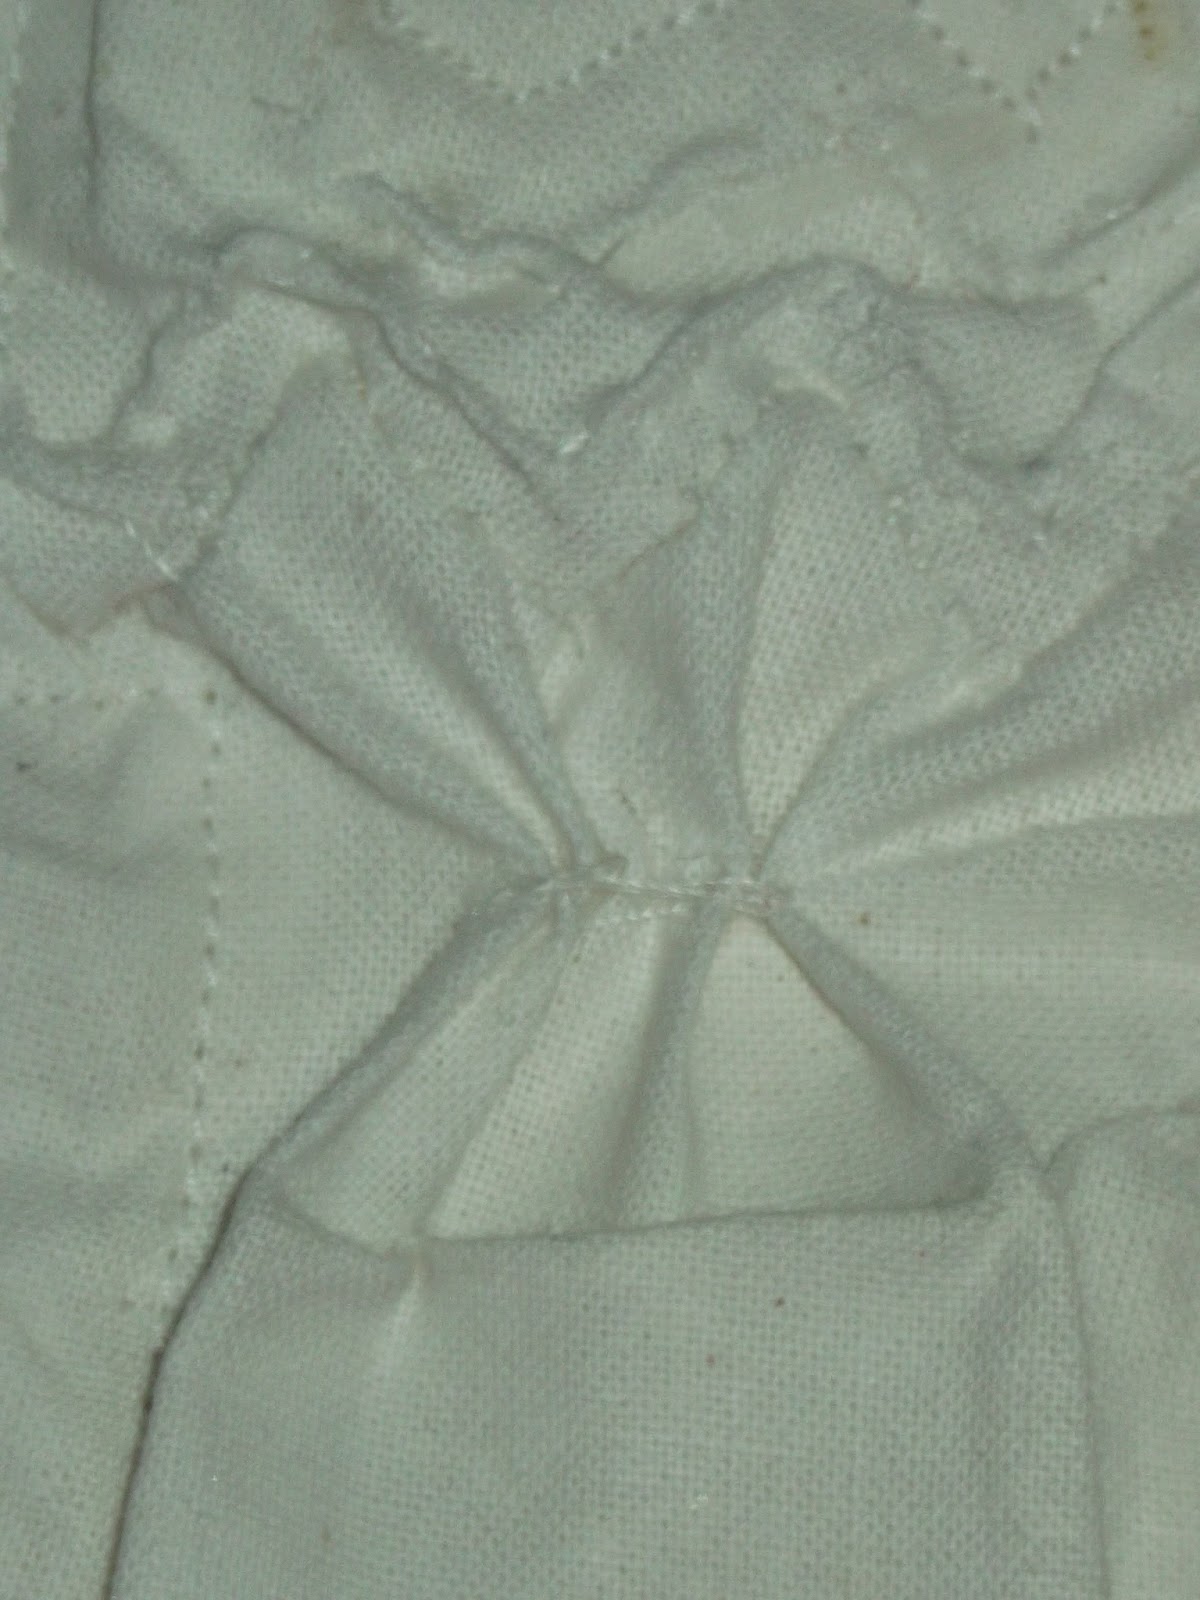
| Pinching zigzags of fabric to make tucks |
At this point, I realised the extent of the variation in the sizes of loose fabric between the arches, and that I could not predict how much fabric any particular fabric manipulation technique would take up, so I could not be able to stick to my plan of horizontal lines of different techniques. And I also found that because I did not want to flatten the arches, it was going to be difficult to accurately measure regular patterns between and underneath them.
I thought about working on it without worrying about the stitches distorting the shape, but that would destroy the aspect of the original drawing that I liked ie the contrast between the flat paper and the relief of the arches. I wanted to keep the whole thing so it could be laid flat (if possible).
I thought about working on it without worrying about the stitches distorting the shape, but that would destroy the aspect of the original drawing that I liked ie the contrast between the flat paper and the relief of the arches. I wanted to keep the whole thing so it could be laid flat (if possible).
 |
| Diamonds marked for tucks As the fabric could not lie flat I did not try to measure it accurately but judged the distances by eye. |
 |
| Random gathers to make a rounder shape at the bottom right. The resulting folds were fixed using machine stitching in an oval shape later. I like the way the bottom of the oval is a reflection of the arch shape. |
I also realised that I was going to have to work it in several stages:
1. Work the parts that needed to be sewn from behind.
2. Tack on the backing and wadding, and do the quilting
3. Finish off.
I experimented with different techniques, trying overall to keep the texture in the spaces between the arches, and to have some sort of connection between the different appearances across the piece.
As the lower right quarter of it was already skewed a bit by the 'toppling' arch, I tried out some different angled lines to see if that would topple it even more.
 |
| A shell shape made with running stitches in arches. |
 |
| The top of this arch was fixed in place by folding and sewing the folds together in one place like English smocking. |
 |
| Two columns were stuffed to give them a smooth and architectural appearance. One was stitched to give it a curved pattern. |
I cut a piece of wadding and backing and tacked them onto the front piece, focussing on fixing down the lines around the arches. Then I did the quilting parts.
 |
| This cording ended up looking like worm casts on a beach |
 |
| This pattern was made by pinching tiny tucks and fixing each one with a double stitch. |
 |
| Tucks and quilting in a fan shape |
I cut a piece of wadding and backing and tacked them onto the front piece, focussing on fixing down the lines around the arches. Then I did the quilting parts.
 |
| Straight machine quilting |
So I turned the edges over the wadding and overstitched them on the back.
 |
| Stuffed circles joined by tucks |
 |
| My finished sampler for Project 6 |
REFLECTION:
How does working with the fabric in this way compare with working directly with stitch?
In some ways manipulating fabric limits what I can do in some senses - in the colour in this case - but mostly it opens more and yet more possibilities. Now I have done this exercise I would like to try out what happens to the 3D shape of fabric when you do particular tucks or folds on it. Whether I can use that to make shapes in space. I like the way it uses the qualities of the fabric more directly. And how you can use shadows to define textures and patterns.
Focussing on applique, and the other techniques in that section, was interesting to me as I had not previously thought of these techniques as something separate from stitching, that you can deliberately control the effect of in that way. It emphasised to me the effects of the edges of the fabric, too. And the effects of putting them in layers, or contrasting fabrics next to each other. These effects are of course different from the effects of putting, for example, matt and shiny stitches next to each other. The effects can be subtle or dramatic, complex or simple. And of course are going to be complementary to whatever stitching is used with them.
Are you pleased with the shapes and movements that you have created in both applique and fabric manipulation? What would you do differently?
I like the way my applique sample turned out - it has movement in the wavy lines of different shinyness, and in the contrast between those and the herringbone background. The triangle shapes were placed in a way that moves your eye around when you look at the piece. I would like to work a bit more on the striped 'salmon' shapes, because there's something there that I am intrigued by but I haven't quite got what it is yet. And now I've done the fabric manipulation exercises I wonder if I couldn't make this image even better with a bit of relief!
The fabric manipulation exercises showed me a tantalising glimpse of what can be done with these techniques to give shape and movement to fabric. I am particularly drawn to the piece of muslin with little tucks in crossing lines, that looks a bit like bats wings or something. I would like to try out more of that. And experiment with folding strips around each other to make tubes and other shapes.
The final sample for this project turned out more detailed and complex than I anticipated. And I wasn't expecting to be unable to do any measuring. I think I would have liked it to have been neater, to allow the effects of the particular techniques to stand out better. The pva arches turned out sharp edged as I had hoped, and the arrangement of them worked architecturally the way I expected. They have collapsed a bit while I was doing the other sewing, and I wonder if it might have been better to work the sample the other way round - stitching first.
How did the pieces work in relation to your drawings? Were they very different from your drawings? Did the fabric manipulation technique take over and dictate the final result?
The applique sample was very like the drawing, but working it in fabrics developed the ideas and contrasts further. For example using the herringbone tweed for the background is something I would not have thought of at the drawing stage. And I had a general idea that I wanted contrasting shinyness in the waves, but when the fabric was in my hands it became clearer how I wanted that to look in practice.
For the fabric manipulation sample, it started off like the drawing, but it became rapidly clear that I had not taken into account the different volumes of fabric needed for different techniques, so I changed what I did accordingly. While I worked on it I found that there was a kind of flow to it, with different directions and curviness of lines being needed in different parts of it. Since I kept in mind the ideas that I wanted there to be texture everywhere except the arches, and that I wanted the final result to be 'flat', I did not really allow the techniques to 'take over' exactly. I am now thinking that I want to see what that would be like!
Was it helpful to work from the drawings in the applique exercise? Would you have preferred to play directly with cut shapes and materials?
Before starting this course I would have definitely expected to prefer experimenting directly. But now I have learned how helpful it is to have drawings and ideas in visual form already, even if the final result looks completely different. Why is it helpful? I'm not sure, other than that simply doing the sketchbook exercises opens up more options and brings more ideas to mind. Perhaps it also stops me from going along well dug grooves of what I (or other people) have done before with fabrics.
How do you feel about working with stitch in general? Is it an area you would like to pursue in more depth? Do you find it limiting in any way?
During this project I have really confined my use of stitch to fixing pieces of fabric to each other, and I haven't paid much attention at all to its decorative or expressive qualities. Which are of course infinite. I would like to do more exploration about this. For example I was thinking that the applique sample could benefit from something on top to indicate shadows perhaps. And I have been wondering if I could make some 3D 'roots' with moss stitched onto them, perhaps with appliqued 'bark'. In other words, I've been wanting to combine some of the ideas I have been learning about, including the detail and subtlety that you can achieve with stitching.
Stitch on its own can be used like a paint brush, or to build up a surface to an extent, but ideas can be communicated more powerfully, or subtly, with a combination of different aspects. I am particularly drawn to the satisfying, or witty, ways that fabric can be used in space. I have been thinking I would like to try doing a regular pattern of fabric manipulation to turn a 2D piece of fabric into a 3D shape.
No comments:
Post a Comment