Conker case
 |
| Drawings of conker cases from my sketchbook |
I did these sketches some time ago, of the cases of unripe horse chestnuts that I found in the road. I liked the way the case was so spikey and thick and there was an intriguing inside which you couldn't quite see.
Since my first attempt to linocut the sharp bits, which didn't work so well, I have tried out other linocuts, and discovered some of the trick to it.
I decided to have another go, but this time using the outside of the bottom drawing, combined with the inside of the middle right one, as I thought that would better give the idea of the hidden inside.
 |
| Linocut on sketchbook paper |
When I printed a few together on organza, it looked soft, bulging and mysterious, slightly uncomfortable.
This does appeal to me, but I need to think a bit more about materials and colours to bring out these aspects of it.
 |
| Linocut on organza |
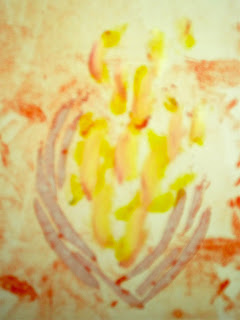
I wanted to try out some background colours to see how they worked with this linocut on top.
My first thought was that I hadn't tried on damp fabric yet, so that was my next attempt.
 This turned out to be interesting but blurry. This turned out to be interesting but blurry. |
| Background colours on damp fabric |
I then tried going the background with Markal paint sticks, which worked a bit better with the rather rococo look of the print.
I did a series of these next to each other. The image is essentially static, and the arrangement static.
For both of these I was using stencils made out of sticky backed plastic, but this was not robust enough to use with these materials and the detail was lost.
Background texture
 |
| Silver Pebeo textile paint directly from the roller onto black cotton |
While using the roller with the lino, I saw that the paint was drawn into unexpectedly delicate lines under the roller. I tried monoprinting with it, but it didn't really come out. So I tried rolling directly onto the fabric when there was very little paint left on the roller. This led to a lovely texture.
 |
| As above, only in 2 directions |
Rolling in two directions gave an even more woven look. It was interesting that in this case it also made squares like this.
 |
| More experiments with a roller |
This was what happened when I did the same on Indian shiny fabric, using a layer of toned down ultramarine, and then gold.
I like the depth of this combination.
I think I want to try out more ways to add layers to a piece of fabric, and how it changes the look.
 |
| I liked this silver on black so much I made it into a clutch bag. |
Block and relief prints
 |
| Collage of arches |
I cut out the foam and stuck it onto a piece of stiff card, and used that to print.
 |
| Red acrylic arch stamps on cotton voile |
 |
| Unfortunately the next time I printed with this block, the top layer of the block came off onto the paper. The marks in the middle are made with Markal paintsticks with the colours smudged with water. |
So, it turns out that this foam is not useful for block printing after all. I have looked on other blogs and found that other students have used large rubbers, but again I have not managed to find any large enough. I will have to ask my tutor what to use, but will not have time to try out something new before my assignment is due in.
 |
| This is what the roller does after having gone over the arch block. This could give an interesting background to something. |


No comments:
Post a Comment